
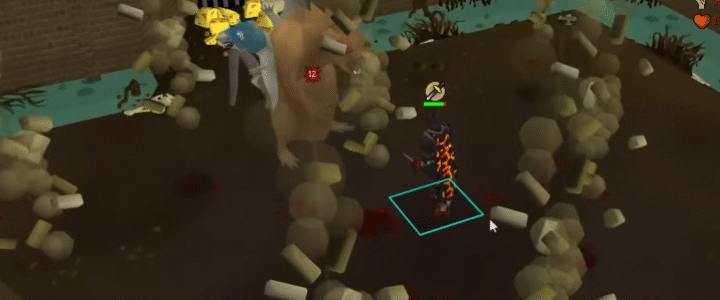
Mmoexp Old School RuneScape: How to Get Elite Void Knight Equipment

Mmoexp Old School RuneScape: How to Get Elite Void Knight Equipment

In Old School RuneScape (OSRS), achieving optimal gear for boss fights, raids, and PvP scenarios is a key part of account progression. Among the most iconic and useful sets is Elite Void Knight equipment – a powerful upgrade to the traditional Void set that transforms players into high-DPS glass cannons. Whether you’re taking on tough PvM encounters or seeking an efficient tribrid gear setup for PvP, unlocking Elite Void should be on your priority list.

This guide walks you through everything you need to know about how to obtain Elite Void in OSRS – including the minigame it’s tied to, the requirements to unlock it, and tips to get your gear faster.

What Makes Elite Void So Powerful?

The Elite Void Knight outfit is a powerful upgrade to the regular Void Knight gear. It’s particularly valued because:

It grants accuracy and damage bonuses to all three combat styles – Melee, Ranged, and Magic.

It allows players to tribrid (swap between combat styles) without switching out full armor sets.

It frees up inventory space for food, potions, and switches – ideal for PvM and PvP alike.

It provides high offensive bonuses with minimal defensive stats, making it the go-to for experienced players who want max damage output.

To get the full effect, players must wear the complete Void set: the Void Knight Top, Robe, Gloves, and a style-specific helm (Ranged, Mage, or Melee).

How to Get Void Knight Equipment

Step 1: Play Pest Control

Void Knight gear is earned by participating in Pest Control, a cooperative minigame located on the Void Knight Outpost. Here, players defend the Void Knight while destroying enemy portals. Upon winning, you receive Commendation Points – the currency used to buy Void OSRS items.

There are three landers in Pest Control, each with different combat level requirements and point rewards:

Novice Lander – Level 40+ Combat – 3 points per win

Intermediate Lander – Level 70+ Combat – 4 points per win

Veteran Lander – Level 100+ Combat – 5 points per win

Combat Achievement Diary bonuses increase points earned:

Easy Tier: +1 point

Medium Tier: +1 point

Hard Tier: +1 point

(Max: 8 points per Veteran game with all tiers complete)

The highest-level lander is the most efficient, especially when playing with friends or organized teams.

Tip: No supplies are lost on death in Pest Control – it’s a safe minigame, making it ideal for Hardcore Ironman players as well.

Step 2: Buy Void Knight Gear

After gathering enough Commendation Points, you can buy your gear from the Pest Control Reward Shop:

Void Knight Top – 250 points

Void Knight Robe – 250 points

Void Knight Gloves – 150 points

Void Knight Helm (Ranged/Mage/Melee) – 200 points each

Requirements to wear Void equipment:

42 Attack, Strength, Defence, Ranged, Magic, and Hitpoints

22 Prayer

How to Unlock Elite Void

Once you own the full Void set, you’ll need to upgrade the Top and Robe to Elite Void – but this requires completing the Hard Tier of the Western Provinces Achievement Diary.

Skill Requirements for Hard Western Provinces Diary:

70 Ranged, 64 Magic, 65 Construction, 56 Agility

75 Thieving, 69 Hunter, 70 Mining, 62 Fishing

70 Cooking, 68 Farming, 50 Firemaking, 50 Woodcutting

5 Fletching (for an easy task)

Quest Requirements:

Swan Song

Recipe for Disaster – Freeing King Awowogei subquest

Mourning’s End Part I

Notable Tasks:

Kill an Elf with a Crystal Bow

Kill Zulrah

Play a Veteran game of Pest Control

Pickpocket a Gnome

Teleport to Ape Atoll

Cook a Monkfish in the Piscatoris Colony

Mine Adamantite in Tirannwn

Once complete, speak to the Elder Gnome Child in the Gnome Stronghold to claim your rewards, including the ability to purchase Elite Void.

Purchasing Elite Void

You’ll need 200 Commendation Points per upgrade:

Void Knight Top → Elite Void Top – 200 points

Void Knight Robe → Elite Void Robe – 200 points

Speak to the Elite Void Knight NPC at the Void Knight Outpost to make the upgrade.

Need Gear or Supplies Fast?

Elite Void may not cost gold directly, but Pest Control demands time and commitment. To make the grind smoother, having strong gear and supplies is key, and that’s where having enough OSRS gold makes a big difference. Whether you’re buying runes, potions, or better weaponry for faster games, gold is your best ally.

Many players turn to MMOexp – a safe, fast, and affordable source for Old School RuneScape gold. With great rates and instant delivery, it’s a go-to option for those who want to boost their game without the grind.

Final Thoughts

Elite Void remains a cornerstone of OSRS’s meta for good reason. It’s affordable (in points), versatile, and uniquely suited to high-level content. Whether you’re a bossing enthusiast, a PvP risk-taker, or a completionist looking to max your account, Elite Void should be on your radar.

So grab your best gear, team up for Pest Control, and make your way to the Void Knight Outpost. The grind may be real, but so are the rewards – especially if you’re stocked up on OSRS gold from MMOexp.

Understanding Level Scaling in Path of Exile 2

Understanding Level Scaling in Path of Exile 2

Path of Exile 2 introduces a refined party experience through a newly implemented level scaling system—designed to help players of different levels adventure together without compromising balance or enjoyment. Whether you’re a newcomer teaming up with a seasoned veteran or a high-level character joining a friend’s lower-tier campaign, level scaling ensures that everyone can contribute meaningfully to combat and progression.

Here’s how this system works, and what it means for gameplay.

What Is Level Scaling?

Level scaling adjusts the stats of party members so that everyone operates closer to the same power level. It’s primarily aimed at making multiplayer sessions more inclusive, especially when characters have a large level gap. The system can be toggled on or off by the party leader, offering flexibility based on the group’s goals.

How Level Scaling Works

With Scaling Enabled

When this option is turned on, higher-level characters are temporarily adjusted to a level closer to the lowest-level member of the group. This adjustment affects damage output, defenses, and other combat-relevant stats, but it doesn’t completely erase the advantages of gear and experience.

Important Details:

Higher-level players still gain experience, but it’s based on the lower-tier enemies they’re fighting.

The experience is scaled appropriately, meaning you won’t be punished for helping lower-level friends—but you also won’t earn max-level rewards from easier fights.

Combat becomes a shared challenge rather than a solo performance by the highest-level player.

This mode ensures all players, regardless of level, have a role in combat and can actively participate in the action.

With Scaling Disabled

If scaling is off, each character retains their original level and full power. This setup benefits high-level players who want to farm or move quickly through content, but it comes with trade-offs:

Low-level players may be overwhelmed by enemy difficulty.

Experience gains are often reduced for fighting enemies far above or below your level.

The group experience can become lopsided, with one or two players doing all the heavy lifting.

In this mode, success often hinges on the lowest-level player’s ability to survive, rather than contribute.

Area Levels and Party Dynamics

Each zone in Path of Exile 2 is designed with a target enemy level. These area levels guide players toward content appropriate for their character strength.Unleash your potential in Path of Exile 2. Get your POE 2 Currency instantly in MMOexp today!

With Scaling On: Everyone can explore together regardless of individual levels, as the system keeps difficulty in check for the whole group.

With Scaling Off: Parties must carefully consider which zones to tackle. A level 30 character entering a level 60 area without scaling may struggle—or be unable—to participate meaningfully.

Benefits and Drawbacks of Both Modes

Scaling Enabled

Pros:

Encourages cooperative play across all levels.

Ensures each player remains an active contributor.

Creates balanced combat encounters.

Cons:

Higher-level players may find progression slower.

The feeling of being overpowered is diminished.

Scaling Disabled

Pros:

Ideal for power-leveling, farming, or speed runs.

High-level players can maximize efficiency and output.

Cons:

Low-level players risk falling behind or feeling sidelined.

Experience gain may be reduced for fighting enemies above your level.

When to Use Each Option

For Diverse Groups: Enable scaling so that all members of the party can engage equally, regardless of level differences.

For High-Level Objectives: Disable scaling when the group is composed of similarly leveled players looking to grind, farm, or complete content quickly.

Level scaling in Path of Exile 2 is a smart solution to a common multiplayer challenge. By giving players the ability to choose how they engage with the system, the game supports both inclusive, cooperative play and focused, high-efficiency runs.Get ready for greatness – cheap POE 2 Chaos Orbs at MMOexp now!

Whether you prefer an even playing field or the full might of your build, understanding when and how to toggle scaling will help you get the most out of your time in Wraeclast.

How to Get Rock Sling in Elden Ring (And Why It’s Worth It)

How to Get Rock Sling in Elden Ring (And Why It’s Worth It)

In the twisted wilds of Elden Ring, few early-game spells offer as much raw power and utility as Rock Sling. As a Gravity Sorcery, it’s a spell that scales with Intelligence and flings massive boulders at your enemies, capable of staggering even large foes with ease.

If you’re running a magic build—or even just experimenting—this is a must-have spell. Let’s break down how to get Rock Sling, what you’ll need to reach it, and how to make the most of its destructive potential.

Rock Sling is a Gravity-based sorcery that summons three hefty rocks from the ground and launches them in a wide arc. While the casting speed is slower than standard projectiles, each hit deals substantial physical and poise damage—especially useful against enemies with high resistances to elemental magic.Unlock secrets and skills – get your Elden Ring Runes now with MMOexp!

Requirements: 18 Intelligence

FP Cost: 18

Scaling: Intelligence

Special Effect: Causes strong stagger, particularly effective against humanoid or large enemies

Best Staff to Pair With: Meteorite Staff (boosts Gravity sorceries)

Where to Find Rock Sling

You’ll find Rock Sling in a chest hidden within the Street of Sages Ruins, deep in the heart of Caelid—a toxic, decaying wasteland teeming with rot and danger.

If you’re brave enough to explore it early, you can snag this powerful spell well before facing some of the game tougher challenges.

Step-by-Step Guide to Getting Rock Sling

Step 1: Use the Teleport Trap at Dragon-Burnt Ruins

You can reach Caelid early by triggering a teleport trap in Limgrave.

Head to the Dragon-Burnt Ruins, located in the center of Agheel Lake.

In one of the basements, open a suspicious chest—this will teleport you to Sellia Crystal Tunnel in Caelid.

Once you arrive, don’t fight. Sneak or sprint past the enemies and activate the nearby Site of Grace.

Exit the mine and head west to escape the tunnel.

Step 2: Navigate to the Street of Sages Ruins

From the tunnel exit, ride Torrent westward across the crimson wasteland. Use the map to pinpoint the Street of Sages Ruins—you’ll find them near a small cluster of trees in a swampy area filled with Poison Flowers and other ambient threats.

Keep moving to avoid poison buildup, and use ranged attacks or summons if you need to thin out enemies.

Step 3: Loot the Chest Containing Rock Sling

Explore the western side of the ruins.

You’ll find a small cellar entrance tucked into the stone rubble.

Inside is a chest—open it to claim Rock Sling.

No boss fights. No traps. Just a hidden reward waiting for those who can reach it.

How to Use Rock Sling Effectively

Rock Sling shines in both PvE and PvP for its high stagger potential and long range. Here’s how to make the most of it:

Use for Staggering

Its poise damage can interrupt charging enemies or break boss posture, making it an excellent opener or follow-up.

Pair With Meteorite Staff

Located nearby in the same region, the Meteorite Staff gives a flat 30% boost to Gravity Sorceries and requires no upgrades to use—perfect synergy with Rock Sling.

Stay at Mid-Range

Because it arcs slightly, Rock Sling works best from a distance. Use terrain to your advantage and cast from cover whenever possible.

Dominate in PvP

Catches players mid-roll or during spell windups. Use it to force reactions and punish poor positioning.

Final Tips

Equip the spell at a Site of Grace once you’ve got the required Intelligence.

Use Mind and FP flasks to keep your casting consistent in long encounters.

Combine Rock Sling with faster sorceries to keep pressure on your target between casts.

Whether you’re just starting out or developing a dedicated sorcerer build, Rock Sling is one of the best early-game sorceries you can get in Elden Ring.Use MMOexp to acquire the cheap Elden Ring Items needed to conquer the lands between lands. With MMOexp you can unlock your full potential in just a few clicks. Buy now! It’s powerful, reliable, and accessible earlier than you might expect—if you’re willing to venture into Caelid corrupted heart.

Pair it with the Meteorite Staff and you’ve got a deadly combination that can carry you through some of the toughest battles in the Lands Between.

Let me know if you’d like a follow-up guide on grabbing the Meteorite Staff too—it’s right around the corner.

Path of Exile 2: How to Get Widowhail Crude Bow

Path of Exile 2 is shaping up to be an incredible expansion, and as players dive deeper into its mechanics, certain unique items are standing out. One of the most valuable and cost-efficient weapons for Rangers is the Widowhail Crude Bow. Thanks to its high drop rate and game-changing modifier, Widowhail is a must-have for many builds. Whether you’re leveling up or optimizing a late-game character, this bow’s ability to amplify Quiver stats makes it a standout choice.

However, getting the perfect Widowhail roll requires both luck and the right strategy. That’s where POE 2 Currency comes into play. Having a strong stash of currency can make acquiring Widowhail (or any other key item) much easier, whether through crafting, trading, or outright purchase.

Let’s dive into how to obtain Widowhail, why it’s so powerful, and how POE 2 Currency can help you get the best version possible.

How to Get Widowhail Crude Bow in Path of Exile 2

There are three primary methods for obtaining a Widowhail in Path of Exile 2:

    Random Drops from Enemies

    Using an Orb of Chance

    Trading with Other Players

Each method has its advantages and drawbacks, so let’s break them down.

1. Random Drops from Enemies

Despite being a sought-after unique, Widowhail actually has a fairly common drop rate from level 25+ monsters. This means that players can start farming for it as early as Act 2 in the campaign.

While you can’t directly influence Widowhail’s drop rate, you can increase your overall unique item drop chance by:

    Equipping “Increased Rarity of Items Found” gear – Higher rarity boosts the chance of seeing more unique items.

    Grinding Juiced Waystones in the Endgame – Running high-mob-density maps with rarity modifiers increases overall loot drops.

This method is free, but it’s also time-consuming and luck-dependent.

2. Using an Orb of Chance

Another way to obtain Widowhail is by using an Orb of Chance on a white Crude Bow. This method is based on luck, as Orbs of Chance can transform a normal item into any rarity, including unique.

However, this isn’t the most efficient method, because:

    Widowhail isn’t rare enough to justify using Orbs of Chance over better gambling targets like Headhunter, Dream Fragments, or Astramentis.

    Crude Bows are not commonly sold as white bases, making it hard to mass-attempt Chance Orb conversions.

While this method can work, most players will save their Orbs of Chance for rarer items.

3. Trading with Other Players

The fastest and most reliable way to get a good Widowhail is through trading with other players. Fortunately, because of its higher drop rate, Widowhail is relatively affordable compared to other powerful uniques.

This is where POE 2 Currency plays a huge role. Instead of relying on luck, you can:

    Buy a Widowhail outright from another player using Chaos Orbs, Exalted Orbs, or Divine Orbs.

    Find a high-roll Widowhail (240%+ increased quiver bonus) for a better build.

If you’re playing in Softcore or Hardcore trade leagues, you can check the trade site and look for the best price. Having a good stash of POE 2 Currency allows you to buy the perfect Widowhail roll instead of settling for a low-tier version.

How Does Widowhail Work in POE 2

Widowhail stands out because its own damage stats don’t matter—instead, it multiplies the stats of your equipped Quiver.

The Key Modifier:

  “Increased bonuses gained from Equipped Quiver.”

This means all the stats on your Quiver get multiplied by Widowhail’s modifier, making it one of the most powerful force multipliers in the game.

Breakdown of Widowhail’s Power:

    At 150%, your Quiver bonuses are 1.5x stronger.

    At 220%, your Quiver stats more than double.

    At 250%+, your Quiver stats are multiplied by 2.5x, making it incredibly strong.

Finding the Perfect Widowhail

Ideally, you want a Widowhail with 250%+ increased quiver bonus, but these are expensive. A 240-248% Widowhail is a much more affordable option that still provides nearly the same power boost.

Since high-roll Widowhails can be costly, this is where POE 2 Currency farming becomes crucial. Having Divine Orbs, Chaos Orbs, and Exalted Orbs on hand makes it easier to buy the perfect roll instead of gambling on drops.

Why POE 2 Currency is Essential for Getting the Best Widowhail

Having a good stash of POE 2 Currency makes Widowhail acquisition significantly easier, whether through direct trading or crafting attempts.

Best Ways to Use Currency for Widowhail:

    Buy a high-roll Widowhail directly from the trade site instead of gambling on drops.

    Craft a powerful Quiver to pair with Widowhail using Fossils, Essences, or Harvest crafting.

    Upgrade your gear so that farming high-rarity zones for Widowhail drops is faster and easier.

Best POE 2 Currency for Trading Widowhail:

    Chaos Orbs & Divine Orbs – Commonly accepted for high-roll Widowhails.

    Exalted Orbs – Used in bulk trades for perfect rolls.

    Mirror Shards (for Mirror-tier items) – Rare, but useful for trading absolute best-in-slot gear.

With enough currency, you can skip the RNG grind and secure the perfect Widowhail for your build.

Final Thoughts

Absolutely. Widowhail is one of the best bows in Path of Exile 2, providing insane scaling for any build that relies on Quiver bonuses. Whether you’re leveling up or min-maxing a late-game setup, it’s a cost-efficient and high-impact item that’s relatively easy to obtain.

However, getting the perfect Widowhail—especially one with 250%+ increased quiver bonus—can be expensive. That’s why farming POE 2 Currency is key to securing the best version of this item.

Final Recommendations:

  Farming Widowhail? Equip item rarity gear and grind high-density areas.

  Want the best Widowhail ASAP? Trade with POE 2 Currency for a high-roll version.

  Pair it with a strong Quiver to fully unlock its power.

With the right strategy, Widowhail can be a game-changer for your Ranger build—so start farming, trading, and stacking that POE 2 Currency today!

How to Locate Jiwe in Skull and Bones

How to Locate Jiwe in Skull and Bones

In Skull and Bones, Ubisoft’s expansive pirate adventure, players are encouraged to traverse a vast and dangerous world, uncovering hidden treasures, lore, and thrilling locales. One such intriguing area is Jiwe, a secretive region that adds depth to the game storyline and serves as a great destination for trophy hunters. If you’re aiming to find Jiwe, this guide will help you track it down efficiently, ensuring you’re fully prepared for the journey ahead.

Jiwe is located in the far northwest corner of the Skull and Bones map, which places it within an area that’s relatively accessible, yet still hidden enough to require some effort to uncover. If you haven’t explored the northern territories yet, Jiwe may not be marked on your map. As you approach this area, it will appear as an undiscovered region, signaling that there’s something worth investigating.

Preparing for Your Journey

Before setting sail towards Jiwe, it’s important to ensure that your ship is ready for the adventure ahead. Here are some key steps to take:

Stock Up on Supplies: Ensure you have plenty of food, water, and ammunition. The waters on the way to Jiwe can be unpredictable, and you might face enemy ships or unexpected obstacles along the way.Use MMOexp to get top-tier Skull and Bones Items now!

Repair Your Ship: If your vessel has taken damage in prior encounters, take the time to make repairs. A well-maintained ship is critical to withstanding any skirmishes during your voyage.

Utilize Fast Travel: If you’ve previously explored parts of the northern map, seek out fast travel points nearby. The Dragonback settlement is an excellent starting point for fast travel, allowing you to conserve resources and cut down on travel time.

Once you’re prepared, it’s time to chart your course. Head northwest from the Dragonback settlement, keeping these tips in mind:

Follow Your Map: The waters between you and Jiwe can be vast and confusing, so it’s easy to get turned around. Use your map and compass to stay on track, ensuring you’re heading in the correct direction.

Watch for Landmarks: Keep an eye out for visual markers in the landscape. These can help guide you toward Jiwe and may reveal other interesting locations along the way.

Avoid Dangerous Areas: Be cautious of regions with high pirate activity. Engaging in unnecessary fights can waste your resources and cause damage to your ship, making the journey more challenging.

As you approach Jiwe, it will begin to appear on your map. When you finally arrive, take a moment to appreciate the breathtaking visuals of this hidden locale. Here’s what you should do once you arrive:

Explore the Region: Jiwe is more than just a destination; it’s a lively area filled with unique flora and fauna. Take the time to explore every nook and cranny for hidden treasures, collectibles, or lore that will deepen your understanding of the game world.

Complete Objectives: Depending on your playstyle, Jiwe might contain side quests or objectives that provide useful rewards. Completing these tasks can earn you valuable ship upgrades or new equipment.

Gather Resources: While you’re there, gather any resources you can find. These materials are essential for crafting and upgrading, so make sure to stock up during your visit.

Once you’ve explored Jiwe, here are some tips for continuing your adventure in Skull and Bones:

Keep an Eye on Your Map: As you uncover more hidden locations, be sure to mark them on your map. This will help you plan future expeditions and make it easier to return to key spots.

Upgrade Your Ship: The further you go, the more challenging the world becomes. Upgrading your ship will improve its performance, making it easier to tackle difficult challenges and reach distant regions.

Team Up with Others: Consider joining forces with other players. Multiplayer gameplay can enhance your exploration experience, provide valuable assistance in battles, and make your adventures even more fun. Set sail with confidence – MMOexp has the buy Skull and Bones Silver you need to succeed!

Finding Jiwe is just one of many exciting discoveries you’ll make in Skull and Bones. With the right preparations, a clear path, and a sense of adventure, you’ll uncover its secrets and unlock all that this mysterious region has to offer.