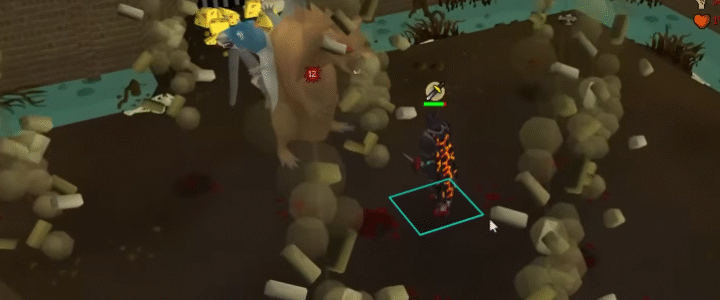
OSRS Osmumten’s Fang Guide: Accuracy Mechanics, PvE Power, and Best Uses

OSRS Osmumten’s Fang Guide: Accuracy Mechanics, PvE Power, and Best Uses

Osmumten’s Fang has quickly become one of the most reliable and versatile melee weapons in Old School RuneScape. Unlike traditional weapons that rely on high max hits or burst damage, the Fang stands out due to its consistency and unique accuracy system. For players focused on efficient PvM, farming bosses, or steadily building their OSRS gold reserves, this weapon is a game-changer.

In this guide, we’ll break down what makes Osmumten’s Fang so powerful, where it excels, and how to use it effectively in endgame content.

What Makes Osmumten’s Fang Unique?

At its core, the Fang introduces a completely different approach to melee combat. Its defining feature is the double-roll accuracy mechanic.

Instead of rolling once to determine if an attack hits, the Fang:

·Rolls accuracy twice

·Uses the better result

This dramatically reduces the number of missed hits and “zero damage” outcomes.

Key Characteristics

·One-handed melee weapon

·Stab-based attack style

·Double-roll accuracy mechanic

·Highly consistent DPS against high-defense enemies

Rather than relying on big hits, the Fang delivers steady, reliable damage over time, making it ideal for longer encounters.

Why Consistency Matters More Than Max Hit

Some players initially underestimate Osmumten’s Fang because its maximum hit can appear lower than that of other top-tier melee weapons. However, in real gameplay scenarios, consistency often outperforms raw damage potential.

1. Exceptional Accuracy

The double-roll system allows the Fang to shine against bosses with high Defense levels. Where other weapons frequently miss, the Fang continues to land hits consistently.

2. Reliable DPS Over Time

Because it avoids missed attacks, its average damage output remains strong across long fights. This makes it particularly effective in sustained encounters like raids or boss farming sessions.

3. One-Handed Flexibility

Being one-handed gives the Fang excellent versatility:

·Pair it with defenders for more DPS

·Use shields for survivability

·Adapt your setup depending on the encounter

This flexibility is a major advantage, especially in high-level PvM content.

Best PvE Uses for Osmumten’s Fang

Osmumten’s Fang is widely regarded as a top-tier PvE weapon, especially in content where enemies have high defense.

Popular Use Cases

·Tombs of Amascut raid

·God Wars Dungeon bosses

·Slayer bosses with high defense

·Group PvM scenarios requiring consistent damage

In these environments, accuracy is critical-and the Fang delivers better than almost any alternative.

PvP Performance: Not Its Strong Suit

While the Fang can technically be used in PvP, it’s not designed for that role.

Limitations include:

·Lack of burst damage

·No strong special attack for KO potential

·Slower kill pressure compared to PvP-focused weapons

PvP combat often revolves around surprise and high-damage spikes, which is where other weapons outperform the Fang. As a result, it remains primarily a PvE-focused tool.

Fang vs Other Melee Weapons

Comparing Osmumten’s Fang to other popular weapons highlights its unique strengths.

Against Low-Defense Targets:

·Weapons like Ghrazi Rapier or Abyssal Tentacle may outperform it due to higher attack speed or max hits

Against High-Defense Targets:

·The Fang often wins thanks to its accuracy, decisively

This makes it an excellent “all-purpose” weapon, especially when facing unknown or mixed-defense enemies.

Gear and Stat Optimization

To maximize the Fang’s potential, your build should focus on:

1. Strength Bonuses

Increasing your Strength stat boosts overall damage output, enhancing the Fang’s consistent hits.

2. Melee Accuracy

Although the Fang already has strong accuracy, additional bonuses further improve its effectiveness.

3. Stab-Focused Gear

Since it uses a stab attack style, gear that enhances stab bonuses is ideal.

Funding Your Fang Setup

As an endgame weapon, Osmumten’s Fang often requires a significant investment. Building an optimized setup around it can cost a substantial amount of OSRS gold.

Players typically fund their progression through:

·Bossing and raid farming

·Slayer tasks

·Grand Exchange flipping

However, not everyone has the time for extended grinding sessions. Some players explore options to buy OSRS gold through trusted marketplaces, allowing them to skip repetitive farming and focus on high-level gameplay.

Whether you choose to grind or accelerate your progress, efficient resource management is key to sustaining long-term success.

Impact on the OSRS Meta

Osmumten’s Fang has reshaped how players approach melee combat in PvE.

Before its release:

·High-defense encounters often required niche weapons or alternative combat styles

After its introduction:

·Players gained a reliable melee option for nearly any situation

·Accuracy became a more central focus in weapon evaluation

·PvE strategies became more consistent and less RNG-dependent

The Fang doesn’t replace every weapon, but it fills a role that was previously lacking in the game.

Is Osmumten’s Fang Worth It?

For most PvE players, the answer is yes.

Ideal for:

·Boss farming

·Raids like Tombs of Amascut

·Players who value consistency over RNG

Less ideal for:

·PvP-focused accounts

·Players seeking high burst damage

·Early-game or budget builds

Its value lies in reliability. If your goal is to maximize efficiency and minimize wasted time, the Fang is one of the best investments you can make with your OSRS gold.

Final Thoughts

Osmumten’s Fang is one of the smartest weapon designs in OSRS. Instead of focusing on flashy damage spikes, it rewards players with stability, accuracy, and dependable performance qualities that truly matter in endgame PvE.

Whether you’re pushing through raids, farming bosses for profit, or optimizing your combat setup, the Fang offers unmatched consistency. And for players aiming to reach that level faster, choosing to buy OSRS gold responsibly can help bridge the gap between grinding and enjoying the game’s most rewarding content.

In a game where efficiency defines success, Osmumten’s Fang stands as one of the most reliable melee weapons available today.


How to Get to Hosidius in OSRS

How to Get to Hosidius in OSRS

Hosidius is one of the most valuable and popular locations in Old School RuneScape (OSRS), standing as one of the five houses of Great Kourend on the continent of Zeah. Renowned for its fertile farming patches, unique cooking ranges, and the rewarding Tithe Farm minigame, Hosidius is a must-visit for members focused on skilling, especially farming and cooking. Unlike some OSRS locations, Hosidius requires a simple initial unlock, after which multiple travel methods become available. This guide breaks down every step to reach Hosidius, from your first visit to the fastest teleport options, ensuring you can access its benefits with ease.

Whether you’re a new member looking to start farming or a veteran seeking to maximize Hosidius Favour rewards, understanding how to travel to this region efficiently is key. The good news is that most travel methods are accessible to players of all progress levels, with no overly demanding quest or skill requirements to get started. To enhance your journey, you can prepare a sufficient amount of OSRS gold.

1. Prerequisite: Unlock Great Kourend (Your First Visit)

Before you can use any teleport method to Hosidius, you must first visit Great Kourend-Zeah’s main kingdom-for the first time. This initial unlock is simple and requires no quests or skill levels, making it accessible to all members.

To unlock Great Kourend, head to Port Sarim’s docks, located southwest of Varrock. Look for Veos, a sailor positioned near the Rusty Anchor Inn (north of the Monks of Entrana). Right-click Veos and select “Port Piscarilius Veos” (not “Land’s End Veos”) to board his ship.

The ship ride to Port Piscarilius is free and takes just a few seconds. Once you arrive, you’ve officially unlocked Great Kourend, and Hosidius becomes accessible. From Port Piscarilius, simply run west to the pub, then turn left and head south-you’ll reach Hosidius in a 2-3 minute walk.

This first visit is critical: it unlocks all future teleport methods to Hosidius. Without it, teleports like the Skills Necklace or Xeric’s Talisman will not work for this region.

2. Travel Methods to Hosidius (Ranked by Convenience)

After your first visit to Great Kourend, you have several reliable ways to reach Hosidius. Each method caters to different playstyles, progress levels, and skill unlocks, so choose the one that fits your current setup.

Method 1: Tithe Farm Teleport (Fastest for Skilled Players)

The fastest way to reach Hosidius is the Tithe Farm minigame teleport, but it requires two key things: 100% Hosidius Favour and having entered the Tithe Farm at least once.

The Tithe Farm is a farming-focused minigame in Hosidius that becomes accessible at 34 Farming and 100% Hosidius Favour. Once you’ve entered it once, the teleport is permanently unlocked in your minigame menu.

To use it, open the minigame menu (via the quest tab), select “Tithe Farm,” and teleport directly to the minigame’s entrance-right in the heart of Hosidius. This method is instant and ideal for players who have invested in Hosidius Favour.

Method 2: Xeric’s Talisman (Best for Mid-Game Players)

Xeric’s Talisman is a versatile item that offers one of the most convenient teleports to Hosidius. It teleports you to Xeric’s Glade, a location northeast of Hosidius’s main farming patches.

To obtain Xeric’s Talisman, you’ll need to kill Lizardmen or Lizardman Shamans in the Kourend Catacombs-these monsters drop the talisman as an untradeable item. The drop rate is low, but consistent farming will yield one eventually.

Once you have the talisman, right-click it and select “Xeric’s Glade.” From there, a short run northwest will take you to Hosidius’s center. This method is perfect for players who frequently grind in Great Kourend.

Method 3: Skills Necklace (Accessible for Most Players)

The Skills Necklace is a tradeable item that offers a quick teleport near Hosidius, making it ideal for players who don’t have Xeric’s Talisman or 100% Hosidius Favour.

You can buy a Skills Necklace from the Grand Exchange for around 12,000 GP-affordable for most mid-game players. Ironmen will need to craft their own using a Gold Bar and a String, requiring 50 Crafting.

To use it, rub the Skills Necklace and select “Woodcutting Guild.” The teleport drops you northeast of the Woodcutting Guild, and a short southwest run will bring you to Hosidius. This method is fast and requires no quest or Favour unlocks beyond your initial Great Kourend visit.

Method 4: Player-Owned House (POH) Teleport (Flexible for Construction Players)

If you have a Player-Owned House, you can move it to Hosidius and teleport directly there using the Teleport to House spell or a House Teleport Tablet.

To move your POH to Hosidius, speak to an Estate Agent (located in major cities like Varrock or Falador). You’ll need 25 Construction (not boostable) and 8,750 GP to cover the move cost. Once moved, your POH portal will be in Hosidius.

The Teleport to House spell requires 40 Magic, while House Teleport Tablets can be used without any Magic level. This method is perfect for players who train Construction or spend time in their POH regularly.

Method 5: Veos’s Ship (Best for New Players)

For new members or players who haven’t unlocked other teleports, Veos’s ship from Port Sarim remains the most accessible option. This is the same method you used for your first visit to Great Kourend.

Head back to Port Sarim’s docks, speak to Veos, and select “Port Piscarilius.” After the short boat ride, run west to the pub, then south to Hosidius. While slower than teleports, it’s free and requires no skill or item unlocks.

Method 6: Fairy Ring (Underutilized but Convenient)

Fairy rings offer another quick way to reach Hosidius, provided you’ve completed “Fairytale II – Cure a Queen” to unlock them. The fairy ring code for Hosidius’s Vinery is AKR.

Teleport to the AKR fairy ring, and you’ll land in Hosidius’s Vinery. A short northwest run will take you to the main area of Hosidius. This method is great for players who already use fairy rings for other travel needs in OSRS.

3. Key Tips for Traveling to Hosidius

To make your trips to Hosidius as smooth as possible, keep these tips in mind.

First, prioritize unlocking the Skills Necklace early. It’s affordable and provides a quick teleport that doesn’t require any Favour or high skill levels, making it perfect for consistent visits.

If you’re focused on farming, work toward 100% Hosidius Favour. Not only does this unlock the Tithe Farm teleport, but it also grants access to protected farming patches and the Hosidius Cooking Range (where food never burns).

Stock up on House Teleport Tablets if you have a POH in Hosidius. They’re cheap, take up minimal inventory space, and let you teleport directly to Hosidius without a Magic level.

For ironmen, focus on obtaining Xeric’s Talisman early. Killing Lizardmen not only yields the talisman but also provides useful loot and XP, making it a productive grind.

4. Common Mistakes to Avoid

Don’t skip your first visit via Veos’s ship. Without unlocking Great Kourend, none of the teleport methods will work-you’ll waste time trying to use teleports that are still locked.

Don’t confuse Port Piscarilius with Land’s End when speaking to Veos. Selecting “Land’s End Veos” will take you to a different location, delaying your trip to Hosidius.

Don’t overlook the spirit tree option. Once you have 35% Hosidius Favour and 83 Farming, you can plant a spirit tree southeast of the Forthos Ruins, providing another quick teleport near Hosidius.

Don’t forget that Hosidius Favour is worth investing in. Beyond the Tithe Farm teleport, it unlocks valuable skilling benefits that make your trips to Hosidius even more rewarding.

Why Hosidius Is Worth Visiting

Hosidius isn’t just a location to check off your list-it’s a skilling hub that offers long-term value. Its farming patches are some of the best in OSRS, with protected herb and fruit tree patches at 50% Favour.

The Tithe Farm minigame provides a unique way to train Farming and earn rewards like seeds, compost, and even the Farmer’s Outfit. The Hosidius Cooking Range also makes it a top spot for training Cooking efficiently.

Additionally, Hosidius is home to the Forthos Dungeon, a mid-level dungeon with valuable loot, and saltpetre mines, which are useful for crafting gunpowder. All these features make Hosidius a staple location for any serious OSRS member. So, to enhance your gaming experience, you can buy RS gold to help you out.

Reaching Hosidius in OSRS is simple once you unlock Great Kourend via Veos’s ship. With multiple travel methods to choose from-whether you prefer the speed of the Tithe Farm teleport, the accessibility of the Skills Necklace, or the flexibility of a POH-you can tailor your trip to your playstyle. By following this guide, you’ll be able to access all of Hosidius’s skilling opportunities and rewards in no time. Happy traveling, adventurer!

OSRS Fletching:More Than Just Arrows

OSRS Fletching:More Than Just Arrows

In Old School RuneScape, few skills offer the blend of utility, profit, and speed that Fletching does. Whether you’re preparing for a Slayer task, gearing up for a boss fight, or simply looking for a fast 99, Fletching is a skill worth your attention.From beginners to experts, everyone needs OSRS gold – shop with RSgoldfast today!

Although often associated with ranged combat, Fletching is far more than just making arrows. It’s a powerful tool for self-sufficiency, an easy route to gold, and a convenient skill to train during downtime.

Fletching is a crafting skill that allows you to make:

Bows and crossbows

Ammunition such as arrows, bolts, and darts

This skill plays a central role for players who rely on Ranged combat. Instead of depending on shops or the Grand Exchange, you can produce your own gear—saving money and time. For Ironman accounts, it’s absolutely essential.

Even beyond practical uses, Fletching contributes to your total level and is one of the fastest 99s in the game—making it a great choice for skillers and maxing accounts.

Ammo Matters: Why You Should Fletch Your Own

Running out of ammunition mid-fight is more than an inconvenience—it can mean death, failed boss attempts, or wasted Slayer trips. With Fletching, you can:

Craft arrows, bolts, and darts on demand

Prepare for PvM without relying on the Grand Exchange

Maintain supply during combat-focused grinds

This is especially valuable for PvMers, PvPers, and Ironmen who need a steady stream of ammunition without interruptions.

Profit Potential: Make Gold While You Train

Fletching isn’t just functional—it’s profitable.

Arrows

1.Create from logs (shafts), feathers, and arrowtips

2.Higher-level arrows (e.g., rune, amethyst, dragon) are always in demand

3.Often used in PvM, PvP, or Ranged training setups

Bolts

1.Combine unfinished bolts with feathers and gem tips

2.Ruby, diamond, and dragonstone bolts are popular for bossing

3.Tipped bolts consistently sell well on the Grand Exchange

Darts

1.Accessible after Tourist Trap

2.Extremely fast XP and widely used with the Toxic Blowpipe

3.Great for both Ironmen and mains looking for rapid Fletching levels

Depending on the market, many fletched items can yield profits or break even—especially when bought in bulk and crafted efficiently.

Flexible Training: Easy to Fit into Any Routine

Fletching shines when it comes to convenience. It’s a skill you can train almost anywhere, anytime—including during other activities.

Multitasking Methods

1.Fletch while walking between activities or waiting in minigames

2.Train while doing Agility laps or traveling for clue scrolls

3.Level passively without interrupting other goals

Efficient Station Training

1.Use banks in Varrock, Grand Exchange, or Prifddinas for high-speed crafting

2.Combine Fletching with Slayer or combat tasks to restock ammo as you go

3.Fast bank-standing methods are perfect for XP grinding

4.The ability to train Fletching on the fly makes it ideal for players who like to multitask or progress while AFK.

A Strong Choice for Skillers and Ironmen

Fletching contributes significantly to account growth beyond combat:

Quick total level gains

Valuable for quest and diary requirements

Essential for Ironmen crafting their own bows, bolts, and blowpipe ammo

For those working toward maxing or account progression, Fletching offers low-effort, high-reward XP that fits naturally into your journey.

Fletching may not have flashy animations or dramatic in-game effects, but it’s one of OSRS most practical and rewarding skills. From ammo production and money-making to fast XP and account progression, it ticks every box.

Whether you’re a PvMer preparing for combat, a skiller chasing efficiency, or an Ironman carving your own path, Fletching will make your gameplay smoother, richer, and more independent.Don’t wait any longer – enhance your OSRS gaming experience with premium cheap RS gold from RSgoldfast! Trust RSgoldfast for unbeatable prices and first-class service!

So don’t overlook it—grab some logs and feathers, and start crafting your way to a better adventure.

Mmoexp Old School RuneScape: How to Get Elite Void Knight Equipment

Mmoexp Old School RuneScape: How to Get Elite Void Knight Equipment

In Old School RuneScape (OSRS), achieving optimal gear for boss fights, raids, and PvP scenarios is a key part of account progression. Among the most iconic and useful sets is Elite Void Knight equipment – a powerful upgrade to the traditional Void set that transforms players into high-DPS glass cannons. Whether you’re taking on tough PvM encounters or seeking an efficient tribrid gear setup for PvP, unlocking Elite Void should be on your priority list.

This guide walks you through everything you need to know about how to obtain Elite Void in OSRS – including the minigame it’s tied to, the requirements to unlock it, and tips to get your gear faster.

What Makes Elite Void So Powerful?

The Elite Void Knight outfit is a powerful upgrade to the regular Void Knight gear. It’s particularly valued because:

It grants accuracy and damage bonuses to all three combat styles – Melee, Ranged, and Magic.

It allows players to tribrid (swap between combat styles) without switching out full armor sets.

It frees up inventory space for food, potions, and switches – ideal for PvM and PvP alike.

It provides high offensive bonuses with minimal defensive stats, making it the go-to for experienced players who want max damage output.

To get the full effect, players must wear the complete Void set: the Void Knight Top, Robe, Gloves, and a style-specific helm (Ranged, Mage, or Melee).

How to Get Void Knight Equipment

Step 1: Play Pest Control

Void Knight gear is earned by participating in Pest Control, a cooperative minigame located on the Void Knight Outpost. Here, players defend the Void Knight while destroying enemy portals. Upon winning, you receive Commendation Points – the currency used to buy Void OSRS items.

There are three landers in Pest Control, each with different combat level requirements and point rewards:

Novice Lander – Level 40+ Combat – 3 points per win

Intermediate Lander – Level 70+ Combat – 4 points per win

Veteran Lander – Level 100+ Combat – 5 points per win

Combat Achievement Diary bonuses increase points earned:

Easy Tier: +1 point

Medium Tier: +1 point

Hard Tier: +1 point

(Max: 8 points per Veteran game with all tiers complete)

The highest-level lander is the most efficient, especially when playing with friends or organized teams.

Tip: No supplies are lost on death in Pest Control – it’s a safe minigame, making it ideal for Hardcore Ironman players as well.

Step 2: Buy Void Knight Gear

After gathering enough Commendation Points, you can buy your gear from the Pest Control Reward Shop:

Void Knight Top – 250 points

Void Knight Robe – 250 points

Void Knight Gloves – 150 points

Void Knight Helm (Ranged/Mage/Melee) – 200 points each

Requirements to wear Void equipment:

42 Attack, Strength, Defence, Ranged, Magic, and Hitpoints

22 Prayer

How to Unlock Elite Void

Once you own the full Void set, you’ll need to upgrade the Top and Robe to Elite Void – but this requires completing the Hard Tier of the Western Provinces Achievement Diary.

Skill Requirements for Hard Western Provinces Diary:

70 Ranged, 64 Magic, 65 Construction, 56 Agility

75 Thieving, 69 Hunter, 70 Mining, 62 Fishing

70 Cooking, 68 Farming, 50 Firemaking, 50 Woodcutting

5 Fletching (for an easy task)

Quest Requirements:

Swan Song

Recipe for Disaster – Freeing King Awowogei subquest

Mourning’s End Part I

Notable Tasks:

Kill an Elf with a Crystal Bow

Kill Zulrah

Play a Veteran game of Pest Control

Pickpocket a Gnome

Teleport to Ape Atoll

Cook a Monkfish in the Piscatoris Colony

Mine Adamantite in Tirannwn

Once complete, speak to the Elder Gnome Child in the Gnome Stronghold to claim your rewards, including the ability to purchase Elite Void.

Purchasing Elite Void

You’ll need 200 Commendation Points per upgrade:

Void Knight Top → Elite Void Top – 200 points

Void Knight Robe → Elite Void Robe – 200 points

Speak to the Elite Void Knight NPC at the Void Knight Outpost to make the upgrade.

Need Gear or Supplies Fast?

Elite Void may not cost gold directly, but Pest Control demands time and commitment. To make the grind smoother, having strong gear and supplies is key, and that’s where having enough OSRS gold makes a big difference. Whether you’re buying runes, potions, or better weaponry for faster games, gold is your best ally.

Many players turn to MMOexp – a safe, fast, and affordable source for Old School RuneScape gold. With great rates and instant delivery, it’s a go-to option for those who want to boost their game without the grind.

Final Thoughts

Elite Void remains a cornerstone of OSRS’s meta for good reason. It’s affordable (in points), versatile, and uniquely suited to high-level content. Whether you’re a bossing enthusiast, a PvP risk-taker, or a completionist looking to max your account, Elite Void should be on your radar.

So grab your best gear, team up for Pest Control, and make your way to the Void Knight Outpost. The grind may be real, but so are the rewards – especially if you’re stocked up on OSRS gold from MMOexp.

OSRS King Long Walkthrough – The Plot Thickens

OSRS King Long Walkthrough – The Plot Thickens

In the vast and ever-mysterious world of Old School RuneScape, few quests blend intrigue, betrayal, and adventure as seamlessly as King Long.The latest chapter, aptly titled “The Plot Thickens,” delivers a whirlwind of revelations that drastically shift the course of your journey.

A Moment of Vindication – But Not for Long

After successfully defending yourself in court and clearing your name, a brief sense of relief washes over you. Yet, respite is fleeting. As you step out of the courtroom, the weight of the kingdom troubles remains ever-present. Your next destination lies east of Camelot Castle, where an unassuming statue conceals secrets waiting to be uncovered.

Make your way toward the statue and prepare for an unexpected twist. As you draw near, a gripping cutscene unfolds, setting the stage for the shocking events to come.Level up your game with instant OSRS gold from RSgoldfast. Experience unparalleled quality and customer support – your adventure starts here!

A Sinister Revelation

During this pivotal moment, you finally come face to face with Anna and David—two enigmatic figures whose presence has loomed over your journey. What begins as a seemingly heartfelt reunion swiftly takes a dark turn. In a moment of chilling confession, Anna and David reveal their true intentions: they orchestrated their father murder and cunningly framed you for the crime.

The weight of their betrayal is staggering. The moment is further heightened by the game atmospheric visuals and voice acting, ensuring that players feel the emotional gut-punch of this revelation. Anna and David’s familial bond, once seemingly unbreakable, is now exposed as a facade masking their sinister ambitions.

The Arrival of Morgan le Fay

Before you can fully grasp the implications of their treachery, an even greater force makes her entrance—Morgan le Fay. A formidable figure of legend, her presence alone commands attention. With a single wave of her hand, darkness consumes you, and you collapse into unconsciousness.

This turning point is pivotal, marking not just a shift in the quest’s narrative but also introducing a formidable adversary whose motives remain shrouded in mystery. What role does Morgan le Fay truly play in this elaborate scheme? And more importantly, what does she intend to do with you?

Awakening in an Unknown Realm

As you regain consciousness, a sense of disorientation grips you. The world around you is unfamiliar, the remnants of chaos lingering in the air. Something has changed, and the threats that loom ahead feel more dangerous than ever. Anna and David remain at large, their schemes continuing to unfold in the shadows.

Your immediate goal is to uncover Morgan le Fay’s true motives and decipher her role in the greater plot. However, time is of the essence. You must act swiftly to prevent further calamity.

Seeking Allies and Unraveling the Mystery

Navigating this new reality will require both strategy and caution. Seeking out trusted allies becomes paramount. Familiar faces like Sir Lancelot and Merlin may hold crucial information that could aid your quest. Their knowledge of Camelot’s history and Morgan le Fay’s past may provide the key to understanding your predicament.

Each conversation, each clue unearthed, brings you closer to the truth. However, not everyone has your best interests at heart. The kingdom is rife with deception, and every step forward must be taken with vigilance.

The Final Confrontation – A Battle of Wits and Will

With knowledge in hand and allies at your side, the time comes to face Anna and David once more. This confrontation is more than just a test of strength—it is a battle of ideals. The siblings have their own twisted justifications, and understanding their motives could provide a crucial edge in the conflict.

Prepare for a complex and dynamic battle. Adaptability is key, as the fight will test everything you have learned thus far. Each decision carries weight, influencing the ultimate resolution of this chapter in your adventure.

A Story of Deception and Discovery

As The Plot Thickens unfolds, players are drawn deeper into a web of betrayal, power struggles, and personal reckonings. Old School RuneScape storytelling truly shines in this gripping chapter, weaving an intricate narrative filled with twists and emotional stakes that elevate the gameplay experience.Get your cheap Runescape gold from RSgoldfast today and enjoy seamless transactions, best-in-class security and unrivalled customer support. Go on the adventure!

From the courtroom final verdict to the shocking reunion with Anna and David, and the looming threat of Morgan le Fay, every choice you make shapes the destiny of your character. In OSRS, the journey is just as important as the destination—so embrace the adventure, for the story is far from over.