
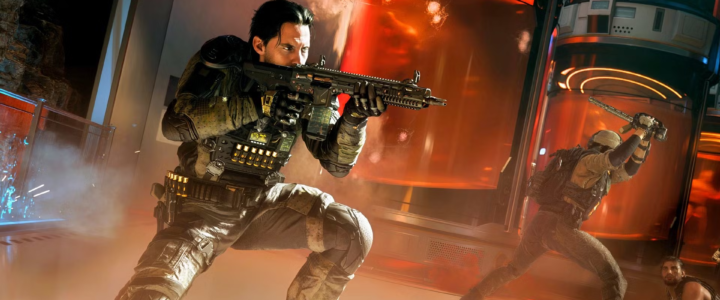
COD BO7: Hawker HX Dominates the Arena, Forcing Opponents to Call a Timeout

COD BO7: Hawker HX Dominates the Arena, Forcing Opponents to Call a Timeout

The Ballista—a classic sniper rifle long-awaited by Call of Duty: Black Ops 7 players—has finally made a comeback as the Hawker HX. This weapon is tailor-made for an aggressive quick-scoping playstyle; with the right setup, it becomes a terrifying force at close-to-medium ranges—allowing even beginners to secure instant kills. Today, we’re breaking down the ultimate fully-kitted Hawker HX loadout for the current meta to help you rack up high kill counts. Want to max out your weapon level and unlock all attachments quickly? Head over to mmoexp to CoD Black Ops 7 Bot Lobbies, boost your level, and unlock the gear you want faster!

Understand the Role: Not a Camper’s Rifle, but an Aggressive Slayer

When players first get the Hawker HX, they often instinctively try to build it like a traditional bolt-action sniper—stacking range and high-magnification scopes—only to find the handling clunky and ineffective. In reality, this gun wasn’t designed for camping or holding angles. Its core strengths are rapid ADS (Aim Down Sights) speed and fluid handling. It is built for constant movement, quick-scoping, and close-quarters combat—perfect for aggressive players who crave excitement and actively push objectives. With the right build, it becomes the deadliest weapon in close-to-medium range engagements.

Target Audience & Value: Ideal for aggressive players who love pushing objectives and quick-scoping. This guide clarifies the weapon’s design logic, helping you avoid the common mistake of modding it like a camping sniper, so you can choose the right build path immediately without wasting time.

Copy This Loadout: The Ultimate Quick-Scope Setup—Every Attachment Hits the Sweet Spot

This loadout is fine-tuned around three core advantages: faster ADS speed, reduced sprint-to-fire delay, and improved accuracy during rapid follow-up shots. Every choice is made to optimize the quick-scoping experience.

For the optic, iron sights are the top choice. While many players find iron sights difficult to use, they actually offer faster ADS speeds than any sniper scope and significantly reduce reticle sway. In quick-scoping, being able to aim just a split-second faster lets you fire first and secure the kill; sacrificing a bit of magnification is a trade-off that pays off massively. For the muzzle, choose the SWF Tishina-11 Suppressor; firing won’t reveal your position on the minimap, allowing you to reposition safely after a kill without worrying about enemies holding angles to exact revenge.

Target Audience & Value: Whether you’re a novice who just unlocked the gun or a veteran with hundreds of matches under your belt, you can use this loadout immediately. Skip the time-consuming trial and error—spend that saved time racking up kills instead.

Perks Complete the Build: Maximizing Mobility

Don’t forget to pair the right perks and equipment; even the best attachments won’t shine with the wrong perks. This setup perfectly complements the Hawker HX’s aggressive, in-your-face playstyle, with every effect synergizing with the weapon.

“Gunslinger” is a must-have pick; it unlocks all eight attachment slots, allowing you to fully equip the loadout above and unleash the Hawker HX’s potential for rapid, snap-aim engagements. For the Field Upgrade, choose the Silent Field; activating it provides comprehensive stealth—mimicking the effects of Ninja, Ghost, and Cold-Blooded—so you can flank enemies undetected by UAVs or proximity mines and quietly take out opponents holding objectives. For tactical equipment, choose the Stim Shot; when rushing objectives with quick-scoping, taking damage is inevitable. The Stim Shot instantly restores full health and grants a brief movement speed boost, allowing you to immediately rush the next objective or retreat from danger after a kill—offering much greater room for error.

Target Audience & Value: Ideal for players who want to maintain a continuous, fast-paced combat rhythm. You won’t need to agonize over perk combinations; this setup maximizes the Hawker HX’s strengths, making objective-rushing and chaining kills incredibly satisfying.

Pro Tips

If you’ve just unlocked the gun but don’t have all the attachments yet, try using a “4x Low-Magnification Sniper Scope” instead of iron sights. The ADS speed penalty is minimal, it allows for long-range engagements, and it’s much easier for beginners to handle.

The BO7 bot match lobby is perfect for practicing your quick-scoping feel. Master this loadout against bots before heading into Ranked play, and you’ll see a significant boost in your win rate.

Unlocking most core attachments requires reaching specific weapon levels. If you want to use the fully optimized “god-tier” sniper rifle sooner, you can purchase cheap CoD BO7 Bot Lobbies directly from mmoexp to boost your game level, letting you enjoy the weapon to the fullest without the slow grind.

The Hawker HX is easily the most fun sniper rifle in Black Ops 7 right now; with the right setup, you can instantly eliminate anyone at close-to-medium range, making it excellent for both practice and actual matches. Apply this configuration, and you’ll soon experience the satisfaction of instant quick-scope kills. Want to gather the resources needed to unlock it fast? Head over to mmoexp to buy coins and boost your in-game level!

BO7 Zombies Ashes of the Damned:Rocket Launch Puzzle Explained

BO7 Zombies Ashes of the Damned:Rocket Launch Puzzle Explained

Reaching the rocket launch sequence in Ashes of the Damned is one of the most stressful moments in Call of Duty:Black Ops 7 Zombies. By the time players arrive at the Zarya Cosmodrome, resources are low, zombies are relentless, and the game suddenly throws a symbol-based logic puzzle into the mix. For many squads, this step ends promising runs simply because the mechanics aren’t immediately obvious.

While the puzzle appears chaotic at first glance, it is actually governed by a strict and repeatable system. Once you understand how the symbols translate and how the terminal inputs work, the rocket launch becomes straightforward every time. This guide walks through all required setup steps and explains exactly how to decode and complete the rocket puzzle without wasting rounds or risking a wipe.

You cannot access the rocket puzzle immediately. Several major easter egg steps must be completed beforehand.

Start by obtaining the Necrofluid Gauntlet, then collect all Serum components scattered throughout the map and complete the full Serum synthesis puzzle. Once the Serum step is finished, locate all three road keys found along the outbound routes from Ashwood and deliver them to their required locations.

After completing these objectives, you’ll unlock the DG-2 Turret Barrel upgrade for Ol’ Tessie. Install the upgrade, then use it to shoot the floating clock tower in Ashwood. When the tower begins glowing, fire the Necrofluid Gauntlet at it and immediately reload. If performed correctly, the gauntlet will turn spectral and emit a purple glow, indicating it has been successfully charged.

With the charged gauntlet ready, travel to the Zarya Cosmodrome. You can either drive Ol’ Tessie southeast from Ashwood or use the Jump Pad near Double Tap Root Beer to reach the area faster.

Once inside the Cosmodrome, locate the two high-speed rotating array towers positioned to the northwest and northeast. Shoot one of them with the charged gauntlet to slow its rotation. Then return to Ashwood, recharge the gauntlet at the clock tower, and repeat the process for the second array. Both arrays must be slowed before the rocket puzzle becomes accessible.

How the Rocket Launch Puzzle Works

After both arrays are disabled, head into the Control Room at the Zarya Cosmodrome, located near the Wisp Tea machine. On the northern wall, you’ll see two display screens cycling through six unfamiliar symbols.

Although the symbols look random, they always translate into one of four predetermined words. The symbols change every match, which is what confuses players, but the final answers never do.

The symbols use a Pigpen cipher, meaning each icon corresponds to a specific letter. Once translated into letters, each letter must then be converted into a number using a zero-based alphabet system:

A = 00
B = 01
C = 02

Z = 25

After decoding the word, turn around and locate the six computer terminals on the northwest side of the Control Room. Each terminal rapidly cycles through numbers. Shoot the red button on each terminal to lock in a value, entering the sequence from left to right.

For example, if the translated word is ROCKET, you would input:

R = 17
O = 14
C = 02
K = 10
E = 04
T = 19

Each terminal must be stopped on the correct number in order.

Avoiding Failed Inputs and Lost Rounds

Entering an incorrect number will immediately fail the launch attempt. When this happens, you must wait until the next round to try again—and worse, the array towers must be recharged once more. With nonstop zombie spawns in the Cosmodrome, repeating this process can quickly spiral into a run-ending mistake.

This is why memorizing the four possible solutions ahead of time is so important. Many experienced players practice this step in Black Ops 7 Bot Lobbies to remove the pressure and fully learn the sequence flow. Some even choose to buy Black Ops 7 Bot Lobbies specifically to drill easter egg steps like this without risking real matches.

When the correct six-number sequence is entered, the puzzle completes instantly. Alarms shut down, zombies despawn, and the rocket ignites before blasting off into the sky. This confirms successful completion of the rocket launch step and clears the way to continue the Ashes of the Damned main quest.

Despite its intimidating presentation, the rocket puzzle is entirely predictable once you understand the cipher and number conversion system. With proper preparation and fast execution, this step becomes one of the simplest parts of the easter egg rather than a run-ending obstacle.

Master this puzzle, and you’ll be one step closer to fully upgrading Ol’ Tessie and completing one of the most challenging Zombies quests Black Ops 7 has to offer.Practice better. Progress faster. Dominate smarter—with MMOexp CoD Black Ops 7 Bot Lobbies for sale.

Call of Duty Black Ops 7 Weapon Guide – Top Sidearm Damage Builds You Must Use

Call of Duty Black Ops 7 Weapon Guide – Top Sidearm Damage Builds You Must Use

Call of Duty: Black Ops 7 has taken multiplayer by storm with its fast-paced gunplay, deeper attachment system, and aggressive movement meta. While most players focus on the dominant Assault Rifles and SMGs, Season 1 has revealed a surprising truth: Pistols are some of the strongest and most underrated weapons in BO7.

Thanks to powerful conversion barrels, faster weapon swap speeds, and improved recoil behavior, several sidearms now function as reliable primary backups-or even full-time lethals in close quarters. Whether you’re sniping, rushing objectives, or running hybrid class setups, a top-tier Pistol build can dramatically improve your survivability and kill potential.

This Black Ops 7 Weapon Guide covers the three best Pistols in Season 1, complete with optimized attachments, tuning priorities, and meta tips. If you want to perfect your accuracy and learn these sidearms in a stress-free environment, many players warm up inside Call of Duty Black Ops 7 Bot Lobbies, but these builds will dominate in any match.

Why Pistols Matter in Black Ops 7

BO7’s weapon sandbox makes Pistols more important than in any previous Treyarch title. With lightning-fast engagements and reduced reload cancel frames, switching to your sidearm is almost always faster than reloading your primary. In ranked matches and high-intensity modes, this “quick-draw backup” can be the difference between winning and losing the fight.

Each Pistol fills a unique niche:

·Jager 45 – Precision sidearm with huge per-shot damage

·Velox 5.7 – Burst-fire accuracy monster for CQB dominance

·CODA 9 – Fully automatic “micro SMG” with the fastest close-range TTK

With the right builds, all three can secure instant kills and provide clutch reliability in any situation.

1. Best Jager 45 Build – The Pocket Hand Cannon

The Jager 45 starts as the standard sidearm, but once you equip the proper attachments, it becomes a mid-range monster. Snipers, marksman players, and AR mains rely on this pistol when they need a high-damage follow-up after a missed shot.

Why This Build Works

·Massive damage per bullet

·Capable of one-tap headshots at mid-range

·Extremely accurate with controlled trigger discipline

·Perfect for quick-swap lethality

The key to the Jager’s meta performance is the long-range conversion barrel, which dramatically increases velocity, damage range, and precision.

Best Jager 45 Attachments

·Muzzle: Ported-45 Brake

·Barrel: 9.6″ MFS Vital Ace Barrel

·Rear Grip: Intercept Grip

·Laser: AirGlide Target Laser

·Fire Mod: Pistol Recoil Sprint

This setup focuses on recoil stability, flinch control, and long-distance consistency. Avoid rapid-fire mods-they reduce stability too heavily and ruin the weapon’s one-tap potential.

2. Best Velox 5.7 Build – The Burst King

The Velox 5.7 is the pistol choice for aggressive run-and-gun playstyles. Its lightning-fast two-burst TTK inside 10 meters makes it one of the strongest backup weapons in Black Ops 7, especially in tight objective modes like Hardpoint and Heist.

Why This Build Works

·Two-burst kill potential at close range

·Ultra-fast weapon swap speeds

·Lightweight, high-mobility playstyle

·Outstanding accuracy for players with good tracking

The Velox rewards skilled burst timing and positioning, turning it into a pocket SMG-killer when used correctly.

Best Velox 5.7 Attachments

·Muzzle: Greaves Covert-S

·Barrel: 4″ MFS Celeste Barrel

·Magazine: Corvus Extended Mag

·Rear Grip: Quick Spine Grip

·Laser: AirGlide Target Laser

This build focuses on faster ADS speeds, mobility, and extra rounds so you never lose a fight because of burst depletion. With the Celeste Barrel equipped, the weapon’s swap speed becomes nearly instantaneous-perfect for panic moments.

3. Best CODA 9 Build – The Pocket SMG Meta

If your playstyle is aggressive, high-risk, and CQB-focused, the CODA 9 is easily the best pistol in Black Ops 7. This fully automatic sidearm behaves like a miniature SMG with absurd time-to-kill potential at close range.

Why This Build Works

·Fastest close-range TTK of any sidearm

·Handles like a tiny SMG with high mobility

·Excellent hip-fire accuracy

·Perfect secondary for snipers, shotgunners, and flankers

It shines in chaotic situations where rapid movement and fast engagements matter.

Best CODA 9 Attachments

·Muzzle: Bowen 9mm Suppressor

·Barrel: 6.3″ Greaves Halberd Barrel

·Magazine: MFS Deltacell Bulk Mag

·Rear Grip: Express Grip

·Fire Mod: Recoil Sync Unit

This loadout smooths recoil, increases effective range, and provides a magazine large enough to down multiple opponents before reloading. The suppressor also keeps you hidden during flanks major advantage for stealth-driven players.

Final Thoughts

Pistols in Call of Duty: Black Ops 7 have never been stronger or more flexible. With the Jager 45 offering long-range precision, the Velox 5.7 excelling in tactical burst damage, and the CODA 9 melting enemies in close quarters, every playstyle has a powerful secondary option this season.

If you’re looking to sharpen your accuracy, master fast-swap mechanics, or test these pistol builds without pressure, many players use or even buy CoD Black Ops 7 Bot Lobbies to practice safely before entering Ranked Play.