
A Guide to FIFA 23 at Any Age

A Guide to FIFA 23 at Any Age

FIFA 23, the latest installment in the popular FIFA franchise developed by EA Sports, offers an engaging and immersive football gaming experience for players of all ages. Whether you’re a seasoned gamer or new to the world of video games, FIFA 23 provides a wide range of features and game modes that cater to different skill levels and interests. This guide will walk you through the key aspects of FIFA 23, highlighting how players of any age can enjoy and excel in the game.

For Younger Players:

FIFA 23 provides a fun and accessible gaming experience for younger players who may be new to video games or the FIFA franchise. The game offers a variety of simplified gameplay options and features that make it easy for young players to get involved and enjoy the virtual football action.

One of the modes that young players can explore is the Kick-Off mode. This mode allows players to jump straight into a quick match with their favorite teams, making it a simple and enjoyable way to experience FIFA 23. The game also offers adjustable difficulty levels, allowing young players to find the right balance of challenge and enjoyment.

For those who want a more structured experience, FIFA 23’s Career Mode provides an opportunity to manage and guide a team to success. Young players can step into the shoes of a manager and make decisions regarding transfers, team selection, and tactics. This mode introduces strategic thinking and decision-making, providing a rewarding experience as they see their team progress and achieve goals.

For Casual Players:

If you’re a casual gamer looking for a relaxed and enjoyable gaming experience, FIFA 23 offers a range of features that cater to your needs. The game provides multiple game modes and customization options that allow you to tailor the experience to your preferences.

The Ultimate Team mode is a popular choice for casual players. In this mode, you can build your dream team by collecting player cards and competing against other players online. FIFA 23 introduces new customization options, allowing you to personalize your team’s jerseys, stadiums, and logos, adding a personal touch to your Ultimate Team experience. With a wide range of players to choose from and various challenges to complete, Ultimate Team offers a dynamic and engaging gameplay experience that can be enjoyed at your own pace.

For the Competitive Players:

If you’re a competitive gamer who thrives on challenging gameplay and online competition, FIFA 23 has plenty to offer. The game provides a range of features and modes that allow you to test your skills against other players and climb the ranks.

FIFA 23’s Online Seasons mode provides a competitive environment where you can face off against other players online and strive for promotion to higher divisions. This mode offers a challenging and rewarding experience as you compete for the top spot and prove your skills against players from around the world.

For those seeking an even more intense competition, FIFA 23’s Pro Clubs mode allows you to create and control your own virtual pro player, joining forces with friends or other players online to form a team. Pro Clubs provides a cooperative multiplayer experience where teamwork and communication are key to success. Competing against other Pro Clubs teams in league matches and tournaments adds an extra layer of excitement and competition to the game.

Conclusion

FIFA 23 caters to players of all ages and skill levels, providing a diverse range of features and game modes that can be enjoyed by everyone. Whether you’re a young player discovering the joy of video games, a casual gamer seeking a relaxed experience, or a competitive player looking for intense online competition, FIFA 23 has something for you.

With its accessible gameplay options, customization features, and engaging game modes, FIFA 23 ensures that players of any age can enjoy the virtual football action. So, no matter who you are or how you like to play, grab your controller, immerse yourself in the world of FIFA 23, and embark on a football gaming experience that suits your preferences and skills.

Best FIFA 23 FUT Coins for sale place to buy from MMOexp.com, 24/7 online Live chat and delivery fast.
OSRS Shield of Arrav Guide

OSRS Shield of Arrav Guide

Shield of Arrav quest is about a shield that has been stolen from the Varrock Museum. The museum is in need of help to track down the shield and return it back to its rightful owners. If you think you have what it takes to complete this quest, then keep reading further and we’ll help guide you through.

Quest Requirements

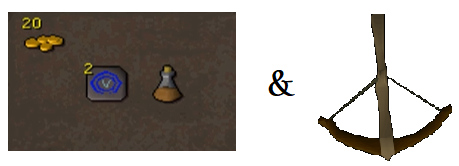
There are numerous quests in OSRS that require a number of items beforehand. However, in terms of the shield of arrav osrs quest, the sole thing that you need is a partner who can join the opposite gang. You can find the other player who will act as your partner by asking around for help in one of the popular in-game clan chats. Other than that, you’ll need 20 OSRS GP for the Phoenix Gang, and Two Phoenix Crossbow for the Black Arm Gang, which can be obtained during the quest.

General Information

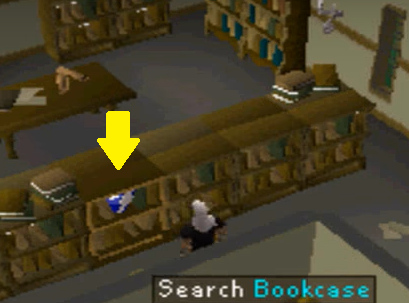
Next up In this shield of arrav guide is the General information. If you’re going to join the Black Arm Gang, you won’t be needing any requirement, and you can straightaway head to Charlie the Tramp and ask him about the alleyway. If you’re going to join the opposite gang (Phoenix Gang), then go to Varrock’s Library and speak to the NPC named Reldo to know about a blue and white book that can be found on the top shelf of the bookcase. Once you’ve read it, speak to him again and ask him about the Phoenix Gang’s hideout. He’ll tell you that he’s not aware, but at the same time, he’ll direct you towards Baraek at the Varrock Square.

The Black Arm Gang

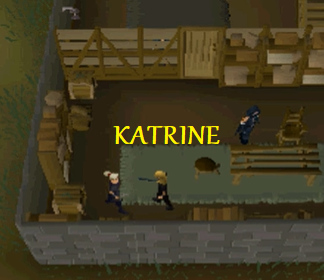
If you’re going to choose the Black Arm Gang in the shield of arrav osrs quest, then as mentioned above, you have to speak to Charlie the Tramp and ask him about the alleyway. He’ll bring it to your notice that it’s the Black Arm Gang’s hideout, so just head down the alleyway and enter the building. Once you do that, speak to Katrine and let her know that you’re aware of the gang and that you want to join them. She’ll then give you a task to earn her trust.

The task is to steal two Phoenix Crossbows from the Rivalling Gang. However, to do so, you’ll be needing a partner who will join the Phoenix Gang. Once that obstacle is out of the way, you can continue your journey by asking your partner to hand you the weapon store key (which your partner will receive when he or she joins the gang). The key then needs to be taken to the Phoenix Gang hideout located southeast from where you’re standing. Upon reaching there, you’ll find a small room south of the rune shop, but the room will be locked, so use the key to unlock it and climb up the ladder.

There will be a weapon master guarding the room, so defeat him and steal the two Phoenix Crossbows. Head back to Katrine and give her both the crossbows to successfully become a member of the Black Arm Gang. After that head upstairs of the building and search the cupboards to find one half of the Shield of Arrav.

The Phoenix Gang

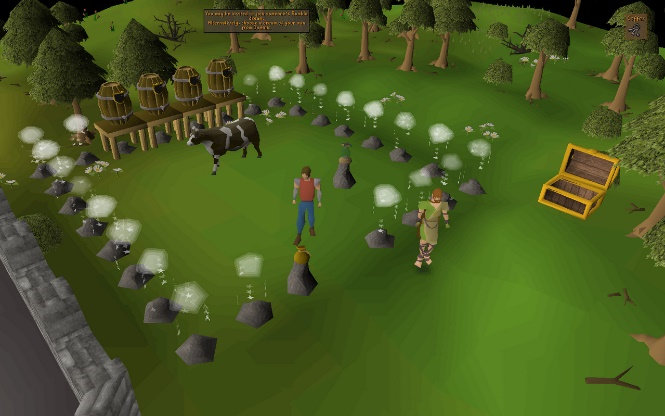
If you’re going to join the Phoenix Gang, you will first need to locate Baraek at Varrock Square and speak to him about the respective gang. He will refuse at first, but you can always change his mind with gold. Give him 20 OSRS Gold and he’ll spill everything out about the gang and where it’s located.

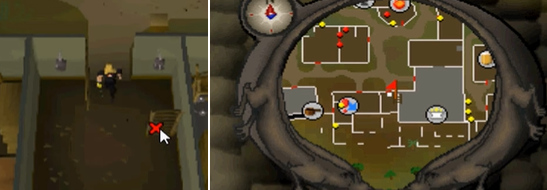
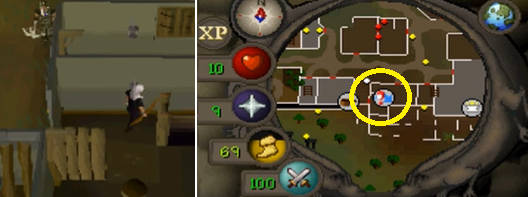
So, head towards the south-eastern corner to Varrock and look for the red exclamation mark on the mini-map to find their hideout. Climb down the ladder and speak to Straven about joining the gang. He’ll start speaking about the Varrock Herald Newspaper, but you will need to expose him entirely by saying that you know he’s a member of the gang. He’ll then give you a task to kill someone to prove your worth and earn their trust.

You must now head into the bar that is located south of Varrock and kill the NPC named Jonny the Beard. Make sure that you pick the dropped report once you kill him, and then take it to Straven to successfully become a member of the Phoenix Gang. Once that’s done, he’ll hand you the Weapon Store Key, which you have to give to your partner in the Black Arm Gang. There is also a chest in the southwestern corner, open it and take the half piece of the Shield of Arrav.

The Varrock Museum

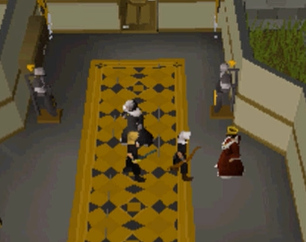
Now, you must take your half of the shield to the Varrock Museum and give it to Haig Halen to receive copies of ‘Half of the Certificate’ in exchange. Your partner will do the same and receive the other half, so trade him or her to get both the halves. Combine it to make a complete certificate, and then take it to King Roald at the Varrock Palace to finish the quest!

Diablo 2 Resurrected Monsters

Diablo 2 Resurrected Monsters

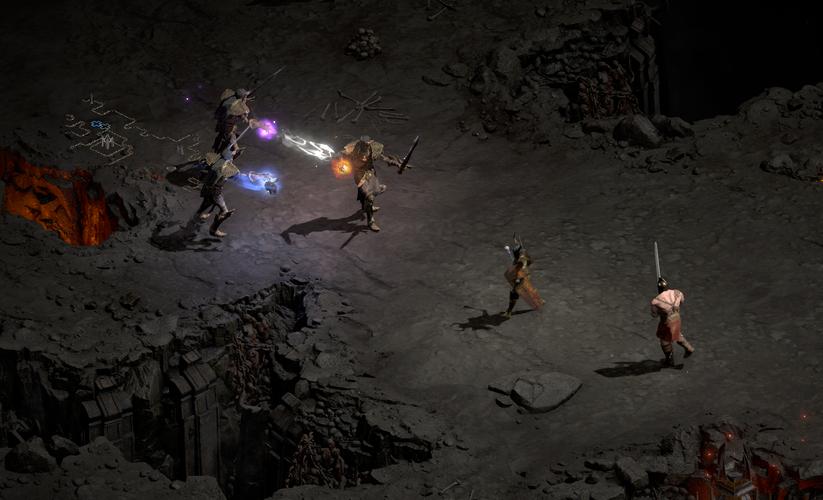
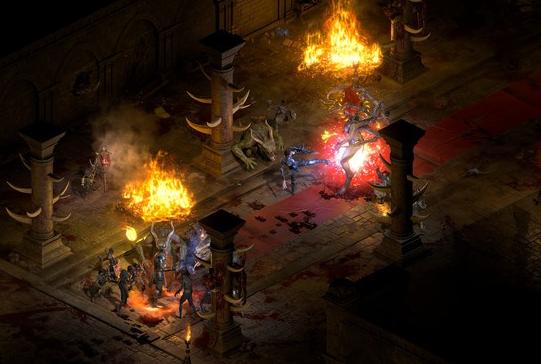
Diablo’s gameplay basically sits on the deaths of thousands of monsters, and if they weren’t intriguing to look at and fight with, then the game wouldn’t be entertaining. Fortunate for us, there are several beasts, undead, and demons in Diablo 2 that make the game enjoyable, as well as profitable to approach.

Basic Monster Information

The basic information is displayed when a player hovers their cursor over a monster. The selected monster then stands out among the others as it appears highlighted. The information is displayed at the top of the screen, and it includes –
Monster Class, Monster Name, Monster Type: White (Standard)/Blue (Champion)/Gold (Unique or Boss), HP, Immunities, and the Modifiers of the monsters.

Monster Types

The monsters in Diablo 2 are classified into three categories: Animals, Undead, and Demons. Monsters of the Undead and Demon categories are labeled, whereas the ones without labels are Animals. Also, undead monsters take up to 150% damage if you utilize blunt weapons.

Multiplayer Gameplay Changes

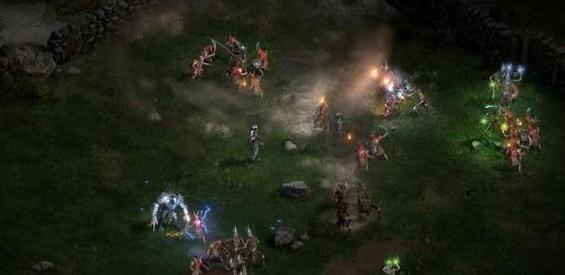
With more players joining the game, monster’s HP and item drop rates have been increased, alongside the damage they can deal, and the EXP gained from them. The platform calculates these figures once the monster spawns and the player is close enough to it. Once they’ve spawned, they retain their actual values whether players enter the game or leave. The HP and EXP are calculated by the following formula in Patch 1.10 and later: HP/EXP = X*(n+1)/2.

Players X

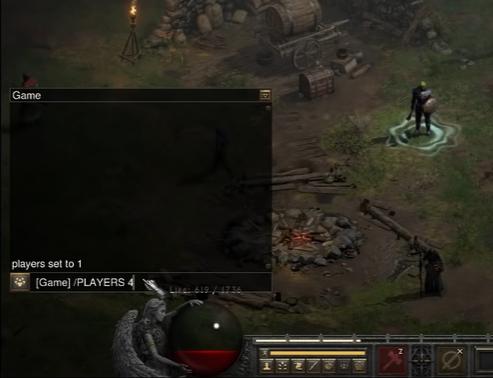
The following command only works for single players. You need to simply type ‘/players X’ where x is the number of players you wish to simulate, for diablo 2 monster level. If you’re looking for a greater challenge with better rewards, you can use the command to increase the monster’s HP and EXP gains. If the monster is already spawned, you cannot change the value.

The command also affects the D2R Items dropped by chests, and the no. of player’s check is done when the chests are opened. You can clear areas on Players 1, and then turn it up to 8 to open the chests; however, the tactic is scorned by legit players.

Monster & Player Levels

You can gain the best EXP from monsters if it’s near the level of your character. Monsters who are within 5 levels (higher or lower) will offer you 100% of the possible EXP. Monsters who are between 6 to 10 levels (higher or lower) for diablo 2 monster level will grant you with EXP that grows lesser with every advanced level. Monsters with more than 10 levels (higher or lower) will grant you only 5% of their EXP.

To or Hit calculations are affected due to M-Levels & C-Levels. Players who have higher levels than the monster gain a bonus, and players who are lower suffer a penalty.

Monster Spells & Projectiles

There are a few monsters that are immune to Physical Damage, Elemental Damage, Poison Damage, and Magic. Immunity was quite common in patch 1.09, but the aspect was balanced again in patches 1.10 and 1.11. Physical immunity is the least common out of the others because players mostly rely upon physical damage to defeat their targets.

If a monster is listed as immune, it means that its resistance is above 100%. You can break such immunities with spells like Conviction, Decrepify, Lower Resistance, and Amplify Damage; however, it doesn’t always help, since it only lowers the resistance by a stated value. If you encounter a monster with high resistance that is above 100%, it’ll still be immune after casting the spells.

Most bosses gain immunity from Monster Modifiers, which you’ll come across on Nightmare and Hell difficulty modes for d2r Monsters. For example, if a monster has a Stone Skin modifier that adds 50% physical resistance to Hell’s difficulty, the boss with the same modifier would increase the percentage to 100.

Monster HP Regeneration

Every monster regenerates its health pool at different rates. Bosses can do that a lot quicker than the regular ones, and the rate keeps increasing as you progress with the difficulty level. You can prevent the regeneration with Poison damage or ‘Prevent Monster Heal’ items. Alternatively, you can use the ‘Open Wounds’ modifier on specific equipment, or simply have them placed through sockets for d2r Monsters.

Monster Difficulty Level

Monsters grow more terrifying with every difficulty. The ones you need to watch out for are Nightmare and Hell difficulty for diablo 2 monsters. Nightmare monsters increase in Level, Defense, Damage, Resistances, HP, EXP, and Chance to Hit. Their skill levels go up by three, and the boss monsters obtain a random Monster Modifier. The same goes for Hell diablo 2 monsters, but the skill levels increase by seven, and they obtain two random Monster Modifiers.

New World Builds: Hatchet & Great Axe

New World Builds: Hatchet & Great Axe

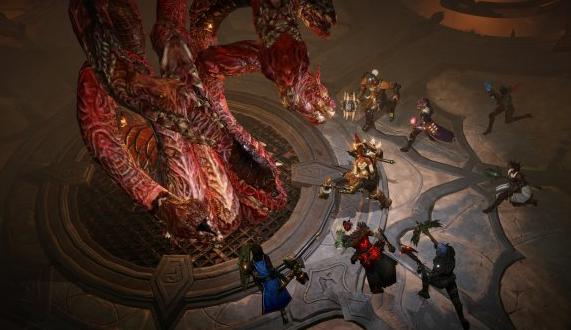
The Hatchet & Great Axe Build centers around damaging the opponent and enhancing the chances of survivability. It’s excellent for solo players who have a hard time clearing dungeons or staying alive against their enemies. Besides that, it is outstanding for expeditions, PVP, group play, etc., making it an all-rounder build in the game. So, if you’ve been looking for something similar, then the following guide is just for you.

Working on the build

Start off with the Hatchet for 1 Vs 1 scenario to deal immense damage with the Berserk ability. Hatchets offer the best single target DPS in the game, and Berserk increases the damage even further while offering you heal overtime capabilities. You can use the Hatchet abilities, Feral Rush, and Raging Torrent when they are off cooldown to further increase the damage, and then swap to the Great Axe to take multiple enemies down, for this New world Hatchet.

It’s worth noting that if you pull in a significant number of enemies or face a larger group of them (expeditions), then you will need your Great Axe to help you out. The reason is that Great Axe offers wide horizontal strikes that can inflict damage upon multiple enemies, and the key abilities are Maelstrom and Gravity Well.

Gravity Well groups up the enemies and deals additional damage depending upon the targets caught it in after its upgrade. Whereas, Maelstrom can damage multiple targets twice once it’s upgraded in a large AOE, thus, making it ideal for such situations. You can also utilize the Reap ability for increased AOE but in a smaller area.

Attribute

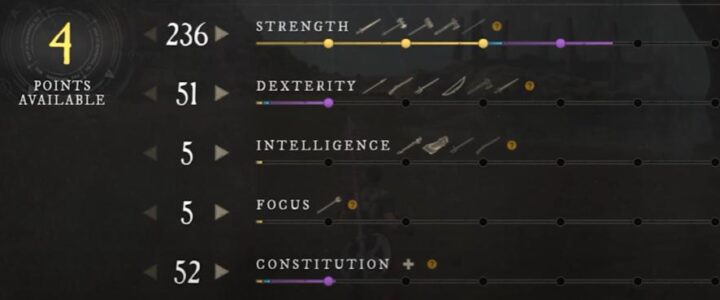
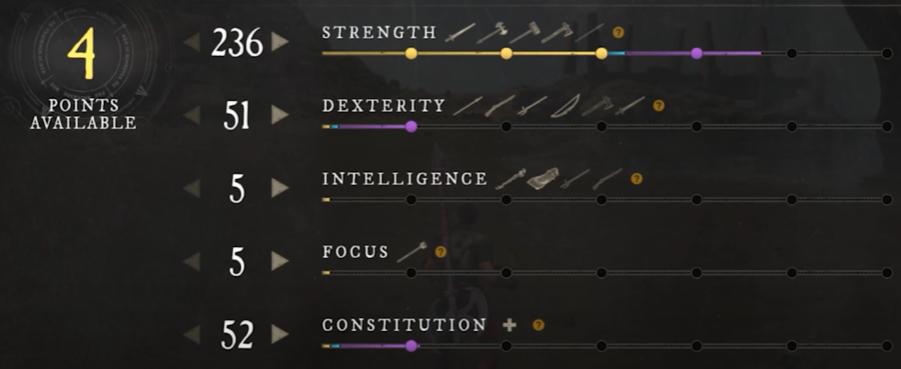
Both the scale of the weapons with Strength, so you need to center around it while adding your attributes onto this build. It’s recommended that you don’t go higher than 250 Strength at the moment, as there’s a bug in the game that slows your character down. If it’s already fixed, then you can increase the attribute to its maximum range. Besides that, Dexterity is also considered in an amount of 50, as weapons gain +5% Crit Chance, but you’ll be able to see the difference more in Hatchet than in the Great Axe. Lastly, the Constitution attribute is also important to increase your chances of survival.

Hatchet Skills

Berserk

Berserk is the strongest skill in the game for this New World Hatchet, and once it’s upgraded, it not only increases your damage, but also helps regain your health, makes you uninterruptible during attacks, and increases your speed of movement.

Raging Torrent

Raging Torrent strikes the enemy with four consecutive swift strikes, dealing an insane amount of damage in less time. Since it can be interrupted easily, you need to be careful while using this ability as you don’t want to waste it, for this New World Best Build. The best suggestion would be to time it when the target is CC-ed, or after it has already landed a blow.

Feral Rush

Feral Rush permits you to close in a small amount of gap while placing you back into the melee range of your enemy. It’s also good in terms of inflicting damage, and it can root the target to the ground so that it can no longer move.

Great Axe Skills

Gravity Well

Gravity Well throws an axe, which then creates an orb to slow down and damage the target caught in it. It helps to group up the enemies so that you and your party members can AOE them down, and in PVP scenarios, it can help stop the opponent from escaping your grasp.

Maelstrom

Maelstrom is the best AOE skill to have, and once you have upgraded it to its extent, then you can hit twice for this New World Berserker. The best thing about this skill is that you don’t have to aim, you can use the skill without thinking while fighting an enemy who you can’t easily land a hit on.

Reap

Reap is a good choice for PVE players to place it as their third ability. It allows you a smaller AOE, which can heal you and offer a decent follow-up once upgraded. It’s reliable for small-scale PVP battles and works well when your Gravity Well is on cooldown, and you’re trying to increase the distance so that your target can be pulled towards you.

Charge

Charge allows you to close the gap between your target, and it’s a must-have skill for PVP battles. After you Gravity Well your target, you can utilize Charge to get in range and finish them off for this New World Berserker. It’s good to use against bosses you have moved away from your range or are attacking from a distance.

Weapons & Armor

You’ll need a Hatchet and Great Axe for this build, and you need to look out for weapons with Strength attributes to boost the overall inflicted damage. Besides that, Crit Chance, Empower, or Bleed on Crit Damage or Backstab or Crit Damage are considerable options for enhanced damage output. A Cut Emerald or Jasper is good to utilize in the gem socket slot for increased damage for this New World Best Build. You can alternatively choose to add a Sapphire or Amber into the sockets for constant damage.

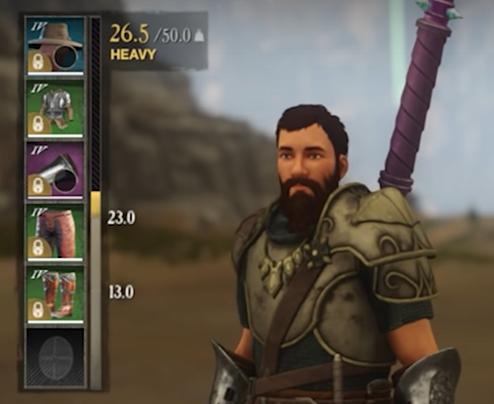
In terms of armor, the best option is to go for the Heavy variant as you’ll need maximized protection against enemy targets. It’s known as the best armor in the game because when you’re surrounded by over five enemies, you can avoid the damage from constant hits while focusing on one target at a time, without worrying about ending up dead. You need to either look out for only Strength or Dexterity + Strength in your equipment.

OSRS Nightmare Zone Guide

OSRS Nightmare Zone Guide

Looking for an easy guide to the Nightmare Zone? Look no further because we have you covered! In the following article, we’ll be discussing everything there is to know about the minigame. For instance, the strategies, required equipment, rewards, the best way to earn points, etc.

Requirements

You need to complete at least any 5 quests mentioned in the following list:

Contact, Desert Treasure, Dragon Slayer, Dream Mentor, Fairy Tale I – Growing Pains, Family Crest, Fight Arena, The Depths of Despair, The Fremennik Isles, The Grand Tree, The Great Brain Robbery, Grim Tales, The Corsair Curse, Haunted Mine, Holy Grail, Horror from the Deep, In Search of the Myreque, Legends’ Quest, Lost City, Lunar Diplomacy, Mountain Daughter, My Arm’s Big Adventure, One Small Favour, Tale of the Righteous, Recipe for Disaster, Roving Elves, Shadow of the Storm, Shilo Village, Tree Gnome Village, Troll Romance, Troll Stronghold, What Lies Below, Witch’s House, and Vampire Slayer.

You’ll also need osrsgold to add to the coffer, depending on which game mode you choose.

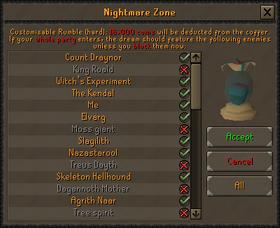
Endurance Normal Mode required 1,000 RSGP, Endurance Hard Mode requires 5,000 coins, Rumble Normal Mode required 2,000 coins, Rumble Hard Mode requires 6,000, and Customizable Rumble Mode requires 22,000 to 26,000 Runescape Gold (Normal/Hard).

If you’ve completed all the Nightmare Zone quests listed above, you’ll get a discount of 10,000 OSRS GP on the Customizable Rumble Mode. There’s also a Practice Mode for starters to get familiar with the gameplay.

Modes Explained

There are a total of three modes in the Nightmare Zone: Practice, Endurance, and Rumble. Each of these modes has different difficulty levels to choose from.

Practice Mode allows you to choose a specific quest boss to battle. It lets you practice different strategies on how to efficiently defeat it. However, as the name mentions, you don’t get any experience or points from it. Hey, but you can get item drops.

In the Endurance Mode, you have to fight every boss in a 1 Vs 1 battle until you defeat them or end up dead. You get a good stack of points for each kill!

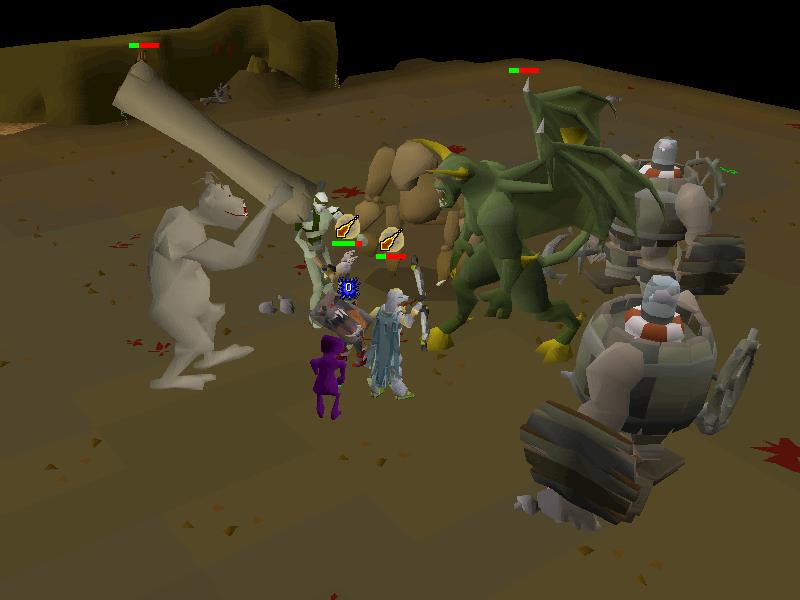
Rumble Mode allows you to play solo or with a group. In this mode, you’ll have to fight randomly selected bosses all at once. The game only ends when all the players are dead. You also get points for each kill.

Normal or Hard?

In Normal Mode, you have to fight monsters at their original level (same as during the quests). Whereas, in Hard Mode, the same monsters will have an increase in their combat stats and HP.

Recommended Stats

You’ll need at least 43 Prayer, 51 Hit Points, 70 Attack, 70 Strength, 70 Defense, 75 Ranged, and 86 Magic to last long enough.

What to Avoid

There are several popular strategies while playing the Nightmare Zone, and some have been refined to even give you the best XP rate every hour.

Before you start approaching the best option, which is obviously Customized Rumble Mode, let’s have a look at what quests and monsters you should avoid.

Dragon Slayer (Elvarg), Fairytale 1 Growing Pains (Tanglefoot), The Family Crest (Chronozon), The Fremennik Isles (Ice Troll King), The Great Brain Robbery (Barrelchest), Grim Tales (Glod), Haunted Mine (Treus Dayth), Horror from the Deep (Dagannoth mother), My Arm’s Big Adventure (Giant Roc), One Small Favour (Slagilith), Shadow of the Storm (Agrith-Naar), Tale of the Righteous (Corrupt Lizardman), Troll Stronghold (Dad), Shilo Village (Nazastarool), Witch’s House (Witch’s experiment), and Recipe for Disaster.

Recommended Items

Grab 4 to 5 Overloads, a God Sword, Coins, and the rest of the inventory filled with Prayer Pots. You can use the Saradomin God Sword special attack to keep your Prayer Potions up for a longer duration.

Besides that, equip a Helm of Neitiznot, Amulet of glory/Fury, Berserker Ring, Ardougne Cloak 4/Fire Cape/Obsidian Cape, Proselyte Hauberk, Proselyte Cuisse, Barrows Gloves, Primordial Boots, Abyssal Whip, Dragon Defender, and Quiver God Blessing.

Rewards

First, which you already know about, are Nightmare Zone points that are rewarded for every boss you kill. Keeping the above tips in mind, you can easily earn up to 300k points per hour.

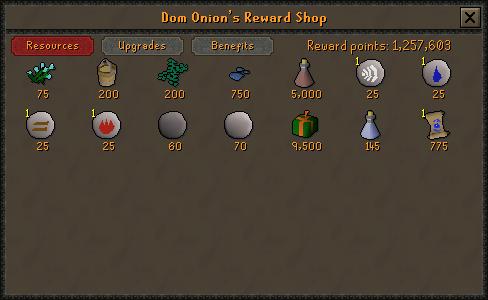
Speaking of item rewards, they are split into three categories. Benefits that are exclusive to the Nightmare Zone, Resources that grant skilling necessities, and Upgrades that allow you to enhance existing items.

Benefit Rewards

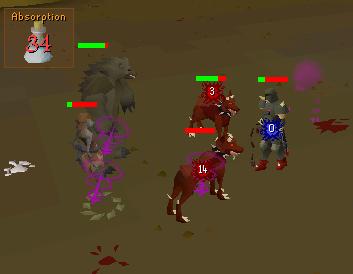
Super range costs 250 points, Super magic costs 250 points, Overload costs 1,500 points, and Absorption costs 1,000 points.

Resource Rewards

Runes cost 25 points, Rune essence costs 60 points, Pure essence costs 70 points, Flax costs 75 points, Vial of water costs 145 points, Snape Grass costs 175 points, Bucket of sand costs 200 points, Seaweed costs 200 points, Red Spiders’ Eggs cost 300 points, Dragon scale dust costs 750 points, Scroll of redirection costs 775 points, Potato cactus costs 1,250 points, Compost potion costs 5,000 points, and Herb box costs 9,500 points.

Upgrade Rewards

Black mask costs 1.25M points, Slayer helmet costs 1.25M points, Salve amulet costs 800K points, Salve amulet (e) costs 800K points, Ring of suffering costs 725K points, Berserker/Warrior/Archers Rings cost 650K points each, Treasonous ring/Ring of gods/Seers’ ring costs 650K points each, Granite ring costs 500K points, and Crystal bow/shield/halberd costs 20K points each.

Conclusion

That’s the end of your guide. We hope you have everything you need to survive in that dreadful, yet beneficial place called the Nightmare Zone. Good luck!